How to Apply Filters and Color Grading in CapCut Step by Step
Apply Filters and Color Grading in CapCut is one of the best ways to improve your video quality. Good colors give your reels a clean and bright look and appearance professional. A mere clip can appear unbelievable with the correct settings. Color is a big deal, as you know.
Your content is more appealing when you use Filters and Color Grading appropriately in CapCut. People never scroll because the colors are balanced and film-like. The following is a guide where I shall provide all the steps sequentially in simple English.
You will be informed about filters, manual adjustments and pro tips. Let us start.
Why You Should Apply Filters and Color Grading in CapCut
Colors affect mood. Warm tones feel happy and soft. Cool tones feel dramatic or serious. When you edit reels, color grading helps you control this mood.
If you Apply Filters and Color Grading in CapCut, your videos look consistent. This is very important for personal branding. For example, travel creators often use warm and golden tones. Tech creators may prefer cool and clean look.
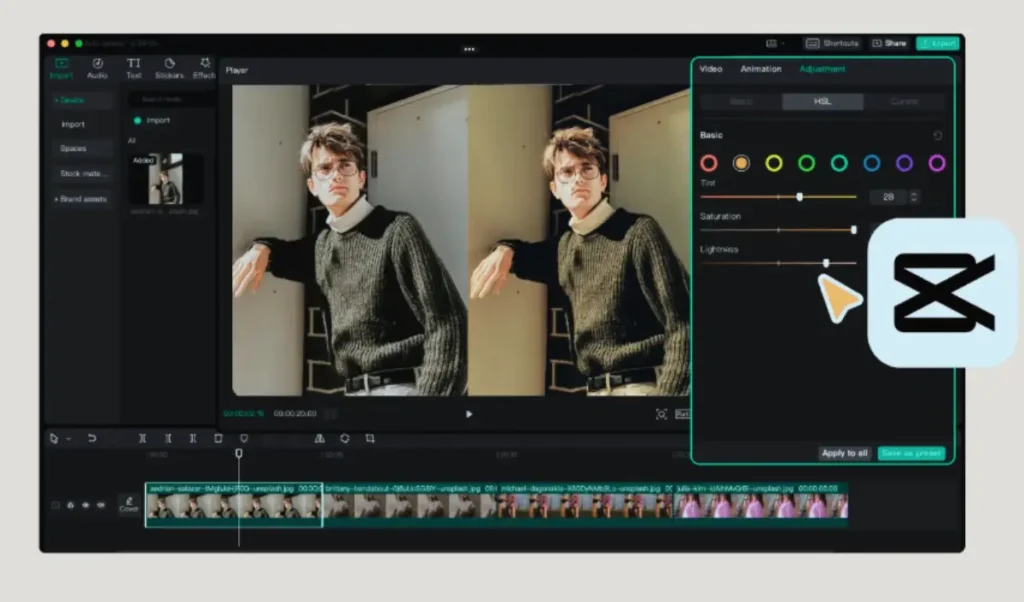
In CapCut 2026 update, filter categories are more organized. You can quickly preview styles before applying. I personally like using light cinematic filters and then adjusting manually for better balance.
Good color makes your video look professional. Poor color makes it look dull.
Difference Between Filters and Manual Color Grading
Filters are ready made presets. You tap once, and the app applies a complete color style. It is quick and simple to learn among novices.
Manual color grading is the process of adjusting such settings as brightness, contrast, saturation, highlights, shadows, temperature and tint. This gives more control.
If you are new, start with filter. Then adjust small settings manually. Combining both methods gives best result.
Honestly, small changes work better than extreme editing.
How to Apply Filters and Color Grading in CapCut Using Preset Filters
Open your project in CapCut. Select the clip you want to edit.
Tap on Filters option. Choose category like portrait, food, movie, or life.
Preview different filters. Select one you like. Adjust intensity slider to reduce or increase effect.
Do not keep intensity at 100% always. Sometimes 40% to 60% looks more natural.
How to Apply Filters and Color Grading in CapCut Manually
Select your clip. Tap on Adjust option.
Now you will have brightness, contrast, saturation and others. Brighten the video in case it is dark. Adjust contrast slightly for better depth.
Change temperature to make video warm or cool. Use tint carefully.
Always preview before saving. Keep skin tones natural. Small adjustments give clean result.
Common Problems While Color Grading
Sometimes video becomes too bright. This is called overexposed. Reduce highlights and brightness to fix it.
In case colors appear excessive, make them less saturated. Excessive saturation makes the skin artificial.
Avoid using CapCut Mod APK because unofficial versions may cause glitches in filter tools.
If your video looks different after export, check resolution settings.
Practice makes better results.
Pro Tips for Cinematic Color Grading
Keep colors natural. Do not over edit. Balanced tones look more professional.
For travel reels, add slight warm temperature. For night scenes, use cooler tones.
Use shadows and highlights carefully. Small changes can improve depth.
If you use CapCut Pro Download from official store, you may get extra filter options and smoother editing tools.
Always compare before and after version.
Conclusion
Apply Filters and Color Grading in CapCut to improve your video quality easily. Filters give quick style. Manual grading gives full control. Together, they create professional look.
Keep adjustments simple. Maintain natural skin tones. Do not indulge in saturation or contrast.
Suffice to say that once you become acquainted with how to apply Filters and Color Grading in CapCut, you would be left with movie-like and beautiful reels.
There is nothing left but to begin practicing and experimenting with different styles to find out your own style.
FAQs
- How to Apply Filters and Color Grading in CapCut?
Select clip, open project, change Filters or Adjust option, change settings and preview before export. - Are filters free in CapCut?
Yes, many filters are free. Some advanced options may require premium access. - Does CapCut 2026 improve color tools?
Yes, CapCut 2026 update improves filter organization and adjustment accuracy. - Can CapCut Mod APK affect filters?
Yes, unofficial versions may cause glitches or missing features. - Is CapCut Pro Download better for grading?
Official CapCut Pro Download may provide extra filters and smoother performance. - What is difference between filter and adjust tool?
Filter applies preset style, while adjust tool allows manual color control. - How to fix overexposed video?
Turn down light and contrast, then tune-up contrast. - Can I copy color settings to another clip?
Yes, you can manually match settings or use copy adjustment option if available. - Do filters reduce video quality?
No, filters change colors only. Quality depends on export settings. - Is manual grading better than preset filters?
Manual grading gives more control, but combining both methods works best.