How To Change Opacity In CapCut Images Easy Guide 2026
Changing the Opacity of images in CapCut is an often asked question among the novice editors. A significant number of individuals are using CapCut as a way of editing images and short videos. They are however unaware of how to regulate the image transparency. Opacity will not change anything dramatically, but it is a very little item. It assists your image to appear soft or light or blended.
By studying How To Change Opacity In CapCut Images, you are able to make a better post on Tik Tok, Instagram, or Youtube. The editing tools are easier and smoother in CapCut 2026. Novices can change the measure of opaqueness by only a couple of taps. Frankly speaking, you will love the effect after trying it.

Well, opacity may sound technical. But it is very simple. It is the clarity or the transparency of your image. At a 100 per cent area of the image, the image is in a visible form. When it is 50, the image becomes half clear. That’s it. Simple.
What Is Opacity in CapCut?
The opacity is what determines the intensity or the lightness of your image on the screen. A decrease in the level of opacities makes the image transparent. The more you make it, the harder the picture appears. This is useful, you know, when you want to have a text or another picture behind.
As an example, one would like to add a watermark to his/her video, he/she can use an option of 30% or 40% of opaqueness. This makes the logo visible but not too strong. Many editors use this trick daily. It looks professional and clean.
Why You Should Learn How To Change Opacity In CapCut Images
Learning How To Change Opacity In CapCut Images gives you more control. You can create double exposure effects. You can make soft background images. You can blend two photos smoothly. This is very useful for reels and short videos.
I think that one of the most significant beginner tools is the concept of transparency. Numerous new creators have dismissed it. However, as soon as they begin using it, they enhance the quality of their contents quickly. Minor changes create major changes.
How To Change Opacity In CapCut Images Step by Step
Now let us see the simple steps. Do not worry. It is very easy.
To start with, the first thing to do is to open CapCut and press on New Project. Choose the image to be edited. Add it to the timeline.
Next, tap on the image layer. You will see different options at the bottom. Scroll the toolbar until you find the Opacity option.
Now drag the opacity slider left or right. If you drag left, the image becomes transparent. If you drag right, it becomes solid. Adjust slowly and check the preview.
That’s all. This is exactly How To Change Opacity In CapCut Images in a simple way. After setting it, tap export and save your project.
Advanced Tips for Better Opacity Editing in CapCut 2026
CapCut 2026 offers smoother animation tools. You may use keyframes with the use of the opacity. e.g. start with opacity of 0 and fade to 100. This creates a fade-in effect. It looks clean and cinematic.
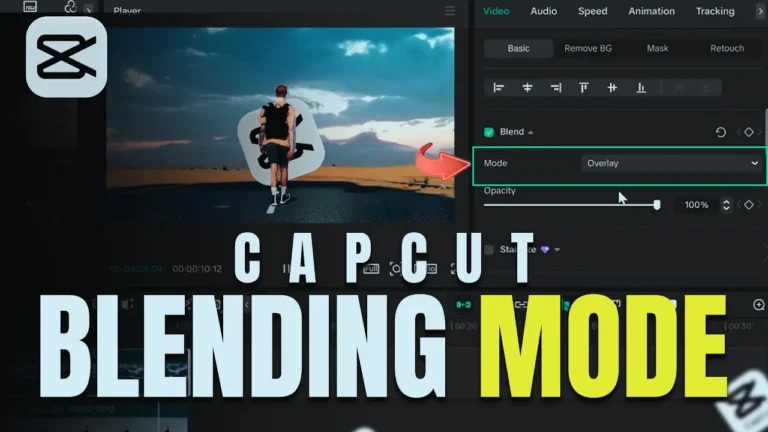
You can also use opacity with overlays. Add a light leak or texture image on top. Reduce opacity to 20% or 30%. It gives a soft film style look. Well, do not overuse it. Keep it natural.
Using Opacity in CapCut Pro APK Version
Many users ask about CapCut Pro APK. The opacity tool is available in the free version too. You do not need Pro for basic opacity control.
However, some advanced blending and export features are better in the premium version. If you plan to use CapCut Pro Download, always choose official sources. It keeps your device safe. Basic opacity editing works smoothly in both versions.
Common Mistakes When Changing Opacity
One mistake is reducing opacity too much. If you set it below 10%, your image may almost disappear. Always preview before exporting.
Another mistake is ignoring layer order. If your image is below another layer, you may not see the effect clearly. Arrange layers properly. Small details matter.
Also, exporting in low quality can affect final look. Choose high resolution settings for best result.
Conclusion
So, now you understand How To Change Opacity In CapCut Images in a very easy way. It is not complex. It is just a slider that controls image transparency. But the effect is powerful.
When you use opacity correctly, your edits look more professional. You are able to make smooth transitions, watermark effects and glamorous overlays. It can be learned in minutes even by beginners.
CapCut 2026 makes editing smooth and fast. The interface is simple and user friendly. You do not need heavy software for small changes. Just practice daily.
Honestly, if you want better visuals, start using opacity today. Try different levels. Experiment a little. You will see improvement quickly. Now open CapCut and practice How To Change Opacity In CapCut Images yourself.
FAQs
1. What is opacity in CapCut?
Opacity controls how transparent or solid your image looks. 100% means fully visible. Lower values make the image see-through.
2. Where can I find the opacity tool in CapCut?
Select the image layer in timeline. Scroll the bottom toolbar and tap on the Opacity option to adjust the slider.
3. Can I change opacity in CapCut mobile app?
Yes, you can easily adjust opacity in the mobile version. The steps are simple and beginner friendly.
4. Does lowering opacity reduce image quality?
No, opacity does not reduce quality. It only changes transparency. Export settings affect quality more.
5. Is opacity feature free in CapCut?
Yes, opacity control is available in the free version. You do not need premium for basic use.
6. How to create watermark using opacity?
Add your logo as overlay. Reduce opacity to around 30% to 40%. Place it in a corner for clean watermark.
7. Can I animate opacity in CapCut?
Yes, it is possible to animate the use of keyframes in order to make things appear or disappear. This aids in making fade in and fade out effects.
8. What is best opacity level for overlays?
Usually 20% to 50% works well. It will be based on your image and preference of style.
9. Does CapCut 2026 improve opacity tools?
Yes, CapCut 2026 offers smoother sliders and better animation support for opacity effects.
10. Do I need CapCut Pro Download for opacity editing?
No, basic opacity editing works in free version. Pro is only needed for extra premium features.